We’re going to focus on scanning UPCs, however I believe the ZBarSDK can be used to scan QRCodes and that may be the topic of another tutorial at a later date (feel free to leave a comment or tweet at me if you would be interested). You can download the sample project here.
To get started I’m going to create a new project and use the Single View template. We’ll need to add a few frameworks to our project:
AVFoundation.framework
CoreMedia.framework
CoreVideo.framework
QuartzCore.framework
libiconv.dylib
You’ll need to download the ZBarSDK from here: http://zbar.sourceforge.net/iphone/ (you’ll need to scroll about halfway down to the section titled “iPhone Developers”. Once you’ve downloaded the DMG file it’s pretty straightforward about how to get the library into your project:
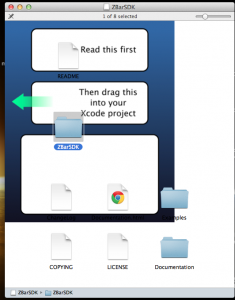
Go ahead and drag the ZBarSDK folder into your XCode project.
In our ViewController’s header we need to import the ZBarSDK header file:
#import "ZBarSDK.h"
Let’s also make our ViewController a ZBarReaderDelegate:
@interface ViewController : UIViewController
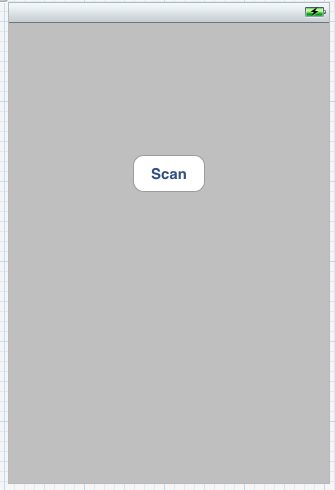
While we’re in the header let’s go ahead and declare an IBOutlet for a UIButton named “scanButton”:
IBOutlet UIButton *scanButton;

@property (nonatomic, retain) IBOutlet UIButton *scanButton;
Also be sure to @synthesize:
@synthesize scanButton;Next we’ll create an IBAction for the scanButton called scanButtonPress:
- (IBAction) scanButtonPress:sender;Your ViewController’s header should now look like this:
#import <UIKit/UIKit.h>
#import "ZBarSDK.h"

@interface ViewController : UIViewController <ZBarReaderDelegate> {
    IBOutlet UIButton *scanButton;
}

@property (nonatomic, retain) IBOutlet UIButton *scanButton;

- (IBAction) scanButtonPress:sender;

@end
Go ahead and create a button in Interface Builder and link it to the outlet and action we’ve created:
Next let’s work on the scanButtonPress action:
- (IBAction) scannerPress:(id)sender{

    ZBarReaderViewController *reader = [ZBarReaderViewController new];
    reader.readerDelegate = self;

    [reader.scanner setSymbology: ZBAR_UPCA config: ZBAR_CFG_ENABLE to: 0];
    reader.readerView.zoom = 1.0;

    [self presentModalViewController: reader
                            animated: YES];

}
We’ll go through line by line:
On line 3, we create a new ZBarReaderViewController and on line 4, set our ViewController as the delegate. On line 6-7, we set up the reader and tell it we’re going to be scanning a UPC (ZBAR_UPCA, you can read about the supported symbologies here) and we want the zoom level to be 1.0. Finally, on line 9, we show the reader. If you’ve ever used the UIImagePickerController. This will begin to seem familiar.
Now we need to setup our delegate method — this is pretty vanilla code from the SDK documentation:
- (void) imagePickerController: (UIImagePickerController*) reader
 didFinishPickingMediaWithInfo: (NSDictionary*) info
{
    id<NSFastEnumeration> results = [info objectForKey: ZBarReaderControllerResults];

    ZBarSymbol *symbol = nil;

    for(symbol in results){

        NSString *upcString = symbol.data;

        UIAlertView *alert = [[UIAlertView alloc] initWithTitle:@"Scanned UPC" message:[NSString stringWithFormat:@"The UPC read was: %@", upcString] delegate:self cancelButtonTitle:nil otherButtonTitles:@"Ok", nil];

        [alert show];

        [reader dismissModalViewControllerAnimated: YES];

    }
}
Basically the Picker can return multiple results, so we’ll enumerate through those (lines 4-8 — also the for loop). On line 10 we actually pull the UPC result from the data returned from the Picker (ZBarReaderViewController) and then on lines 12 and 14 we display that UPC with an alert and dismiss the ZBarReaderViewController modal on line 16.
Again, this is very vanilla information available to you in the official SDK documentation, which is available here, where you’ll also find additional information about the ZBarSDK.
It’s important to note that because the reader uses the camera you will have to run this on an actual device (not the simulator) to test it.